


Yay!! It’s Blog Hop day. I’ve missed the last few hops but now I’ve finished the wedding stationery I’m back to ‘normal’ crafting and loving every minute of it.
The talented Tina of Tina’s Kreativ Box gave us a great theme this month, we were to make a gift box or gift bag for a Secret Santa Gift. To see everyone’s amazing projects please click the ‘Next’ button at the bottom of this post and if you have time they would also love a comment too.

The idea for my Secret Santa project came to me when my daughter Kayleigh was showing me one of the things she’d bought on her shopping trip. I told her about todays theme and asked if I could ‘borrow’ it for a while.
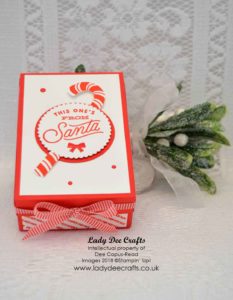
This was definitely the quickest design process for any of my projects, the colours, stamps and ribbon were all based around the gift inside. For the sentiment I just had to use the This One’s From Santa stamp.
When I punched the candy cane it had a white border around it which I didn’t like so I did fussy cut it. The candy cane wasn’t long enough to go behind the sentiment so I cut it in half, nobody will ever know.
The lid felt too plain with just the sentiment and candy cane. I tried rhinestones but they weren’t right then I remembered the Santa’s Workshop Enamel Shapes. I think the bow and enamel dots are perfect.
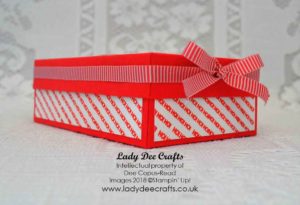
To decorate the sides of the box I stamped the Ho! Ho! Ho! with Poppy Parade ink, I love the red and white stripe effect you get with this stamp.
And finally the gift inside my Secret Santa box is a Candy Cane Bubble Bar from LUSH.
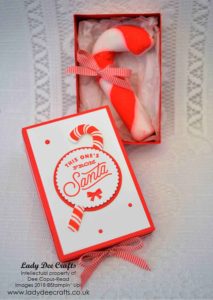
What do you think of my candy cane box? If you didn’t want to put the bubble bar inside you could fit quite a lot in it, the finished dimensions are 4 ½” x 3″ x 1 ½”. You can find a list of the products I used and all the dimensions to make this box below.
Please continue hopping by clicking on the ‘Next’ button below.

Have yourself some crafting fun.
Dee x
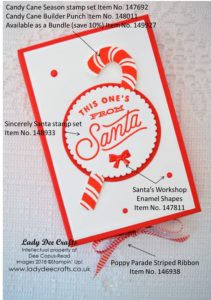
Product List


DIMENSIONS*
Box Base: Poppy Parade cardstock cut a smidge under 7½” x 6″. Score all 4 sides at 1½”.
Box Lid: Poppy Parade cardstock cut at 6″ x 4½”. Score all 4 sides at ¾”.
Stamped panels for the sides: 2 pieces of 4-1/8″ x 1¼” Whisper White cardstock and 2 pieces of 2¾” x 1¼” Whisper White cardstock.
Whisper White cardstock for the lid: 4¼” x 2¾”.
Layering circles: 2-1/8″ circle Poppy parade cardstock and 2″ scalloped circle Whisper White cardstock.
***
When making any project I recommend you make it with cheap cardstock first because when someone is typing up lots of measurements mistakes can be made, we are human after all. I do double check my measurements but I have Dyscalculia.
This tutorial is the Intellectual property of Diane Copus-Read and is for Personal Use only.
If you CASE (Copy And Share Everything) my project and show it on any social media platform, video tutorial or blog post please be courteous and say you CASE’d it from Lady Dee Crafts and add a link to my website/blog post. The link for this blog post is
http://www.ladydeecrafts.co.uk/inspireink-blog-hop-11-secret-santa/

I love this one so cute x
How cute, love it x
Thisis so cute! I love this set xx